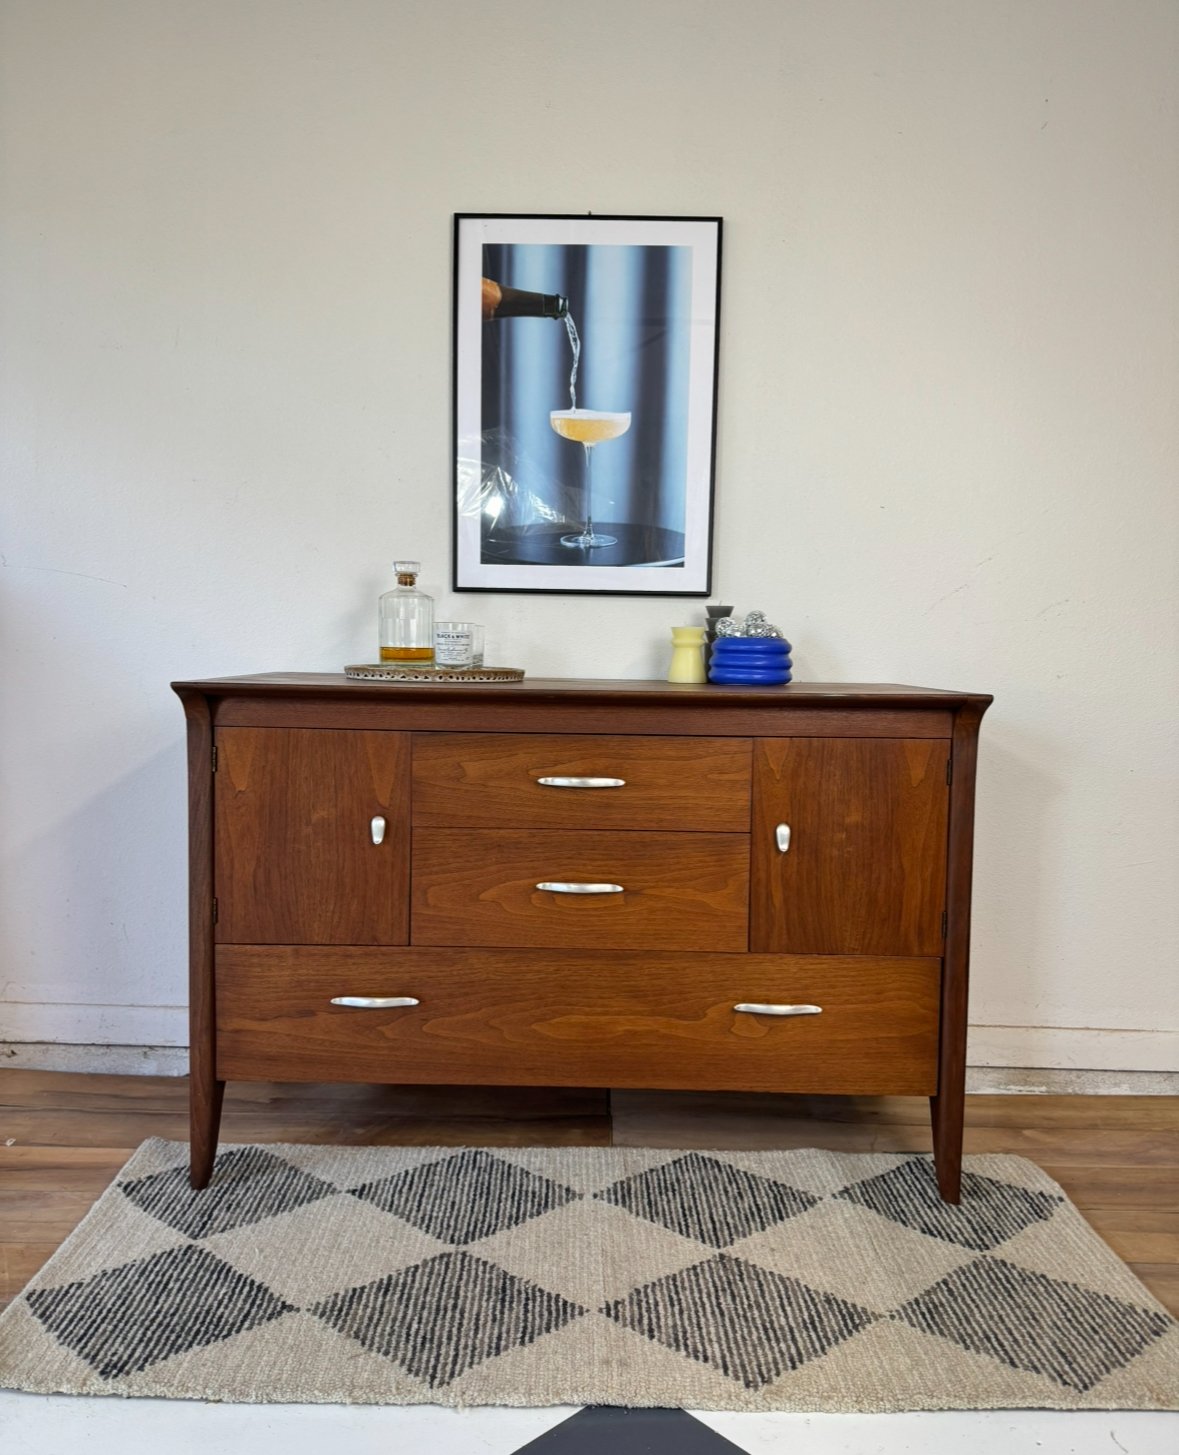
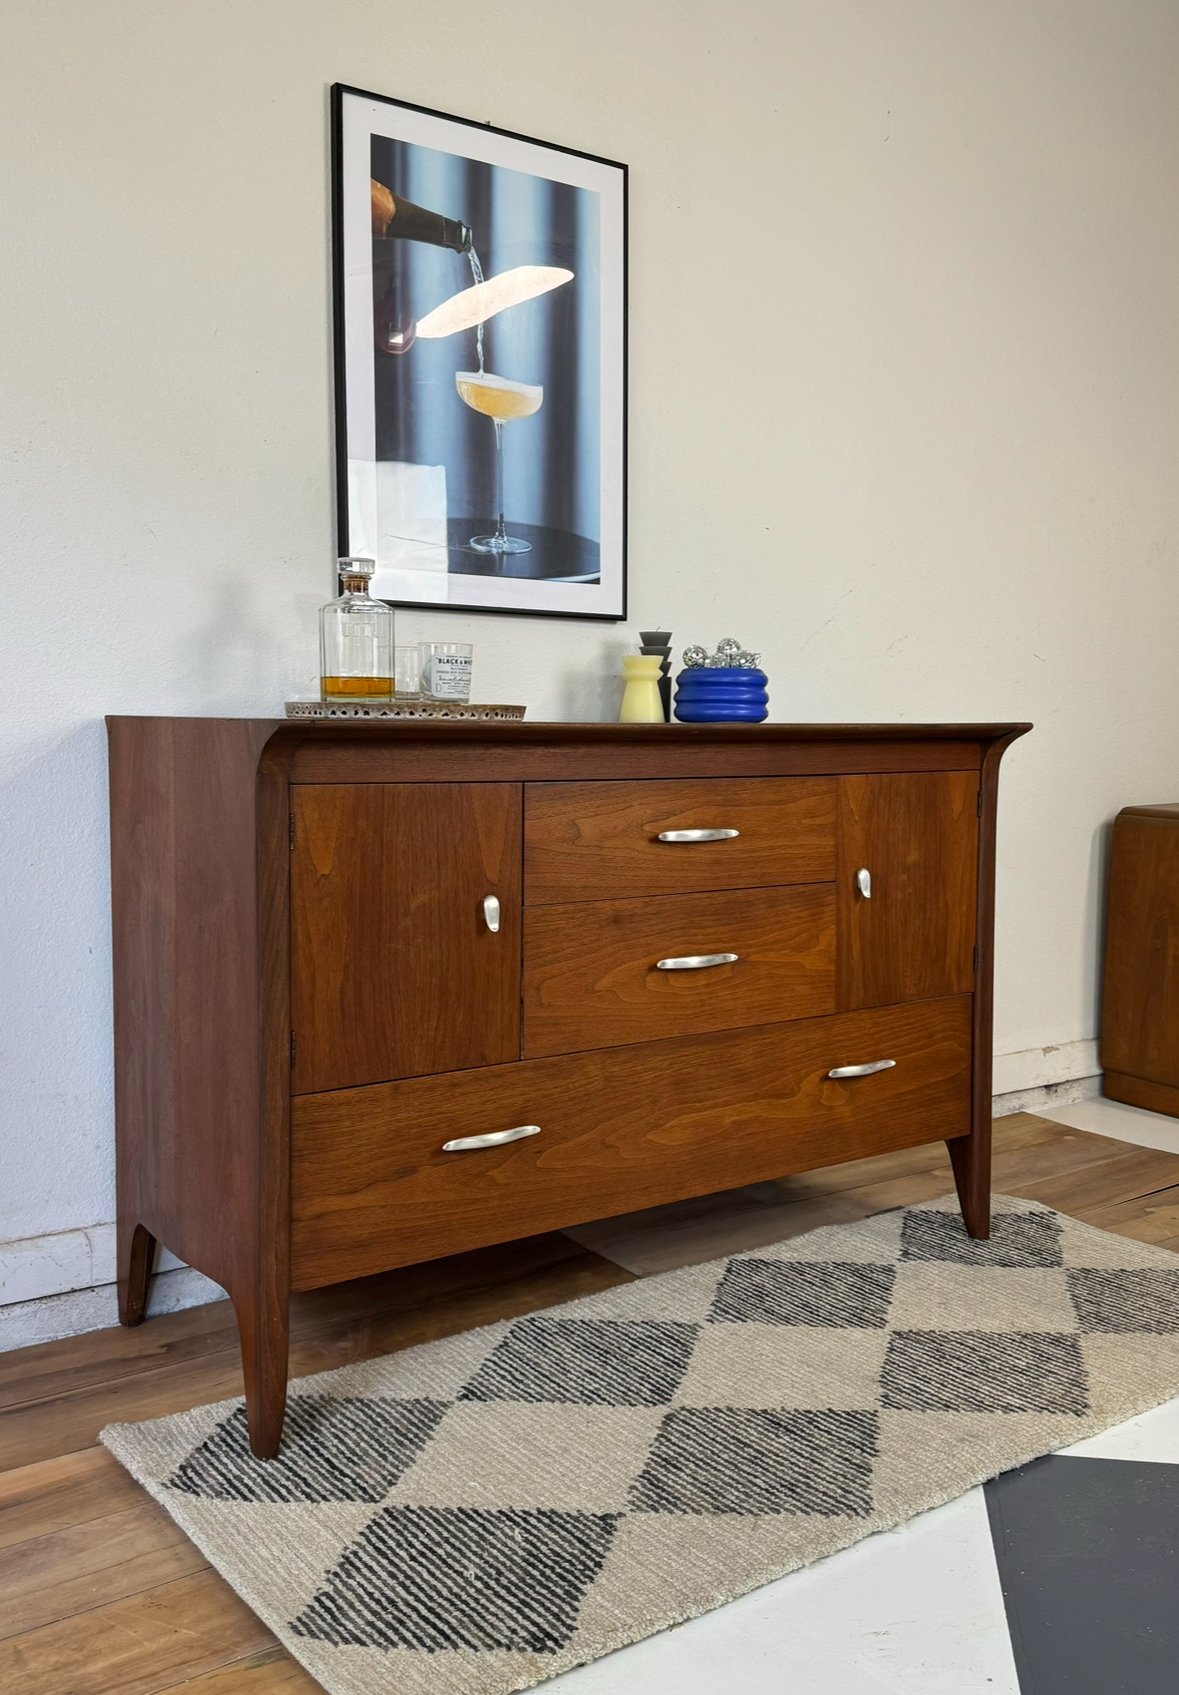
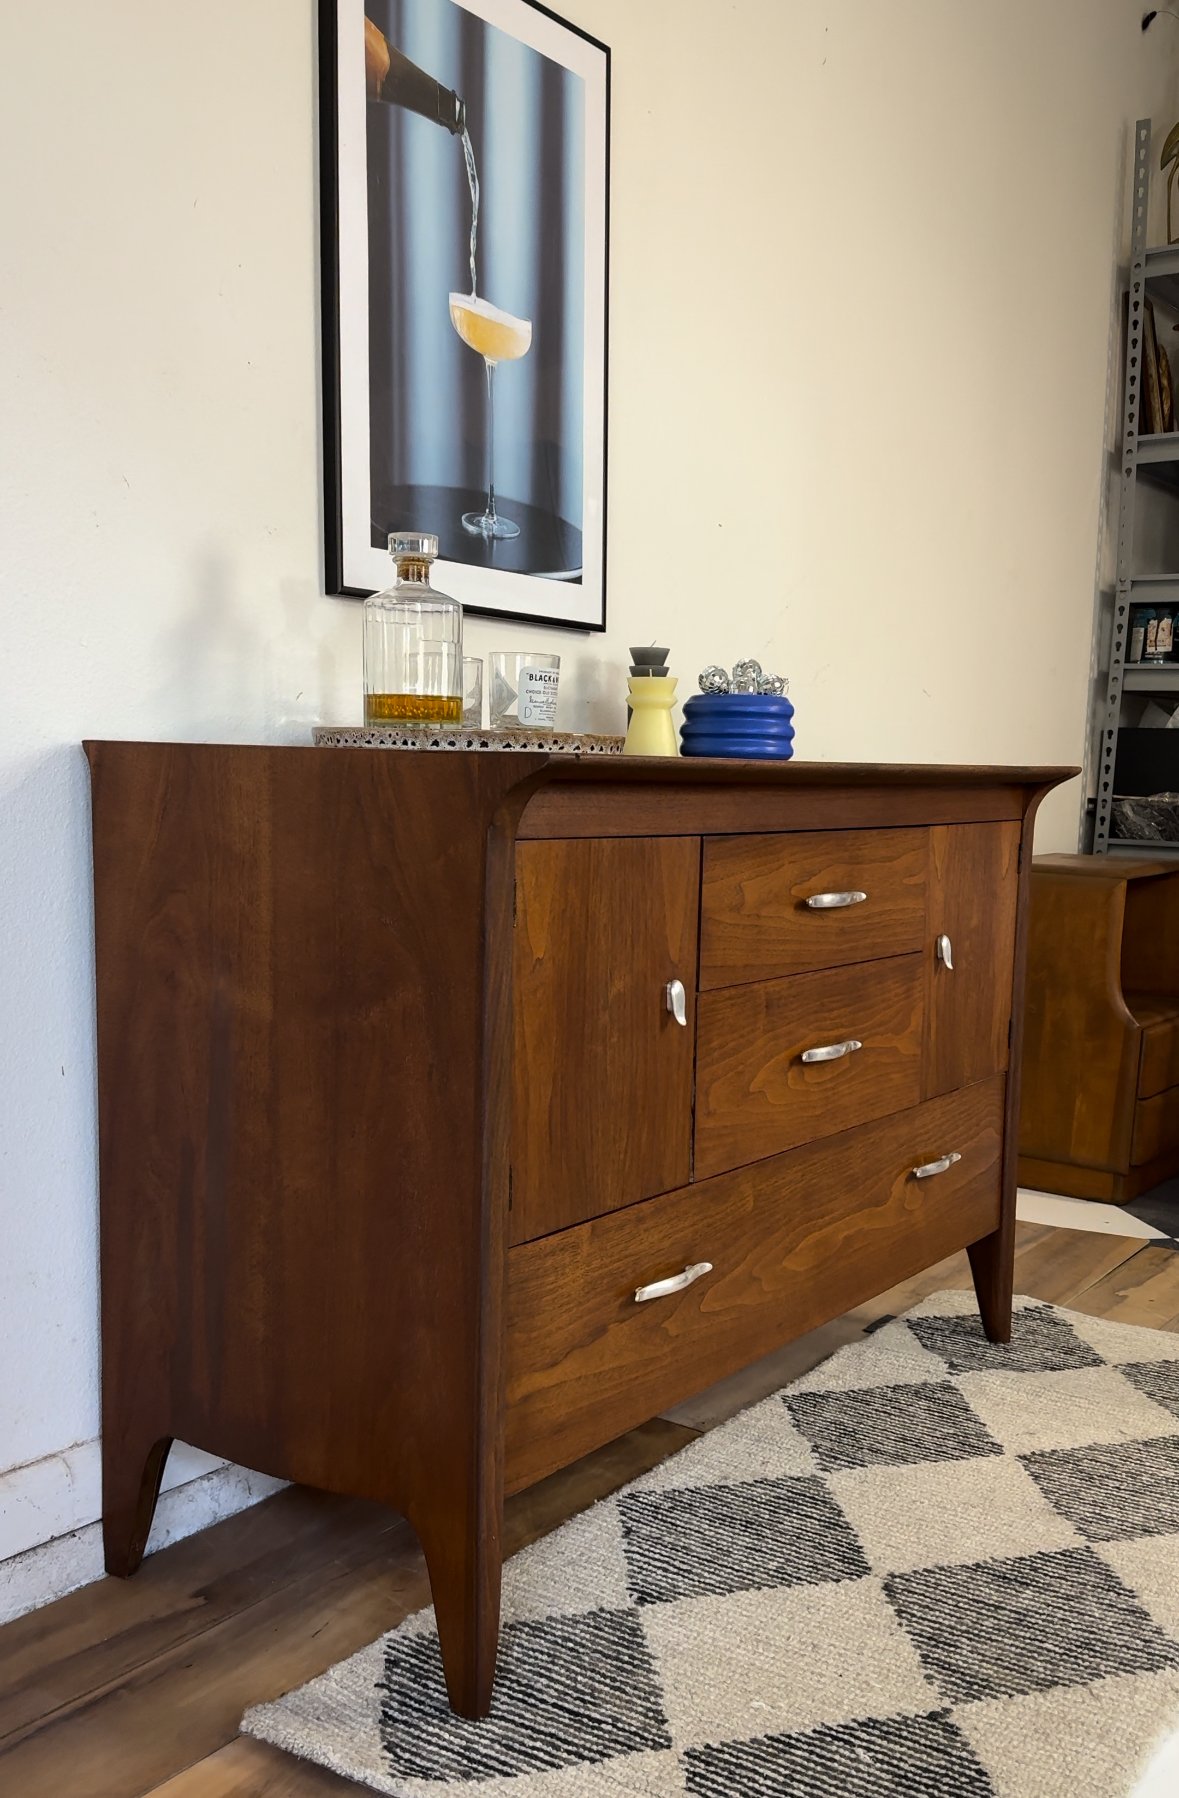
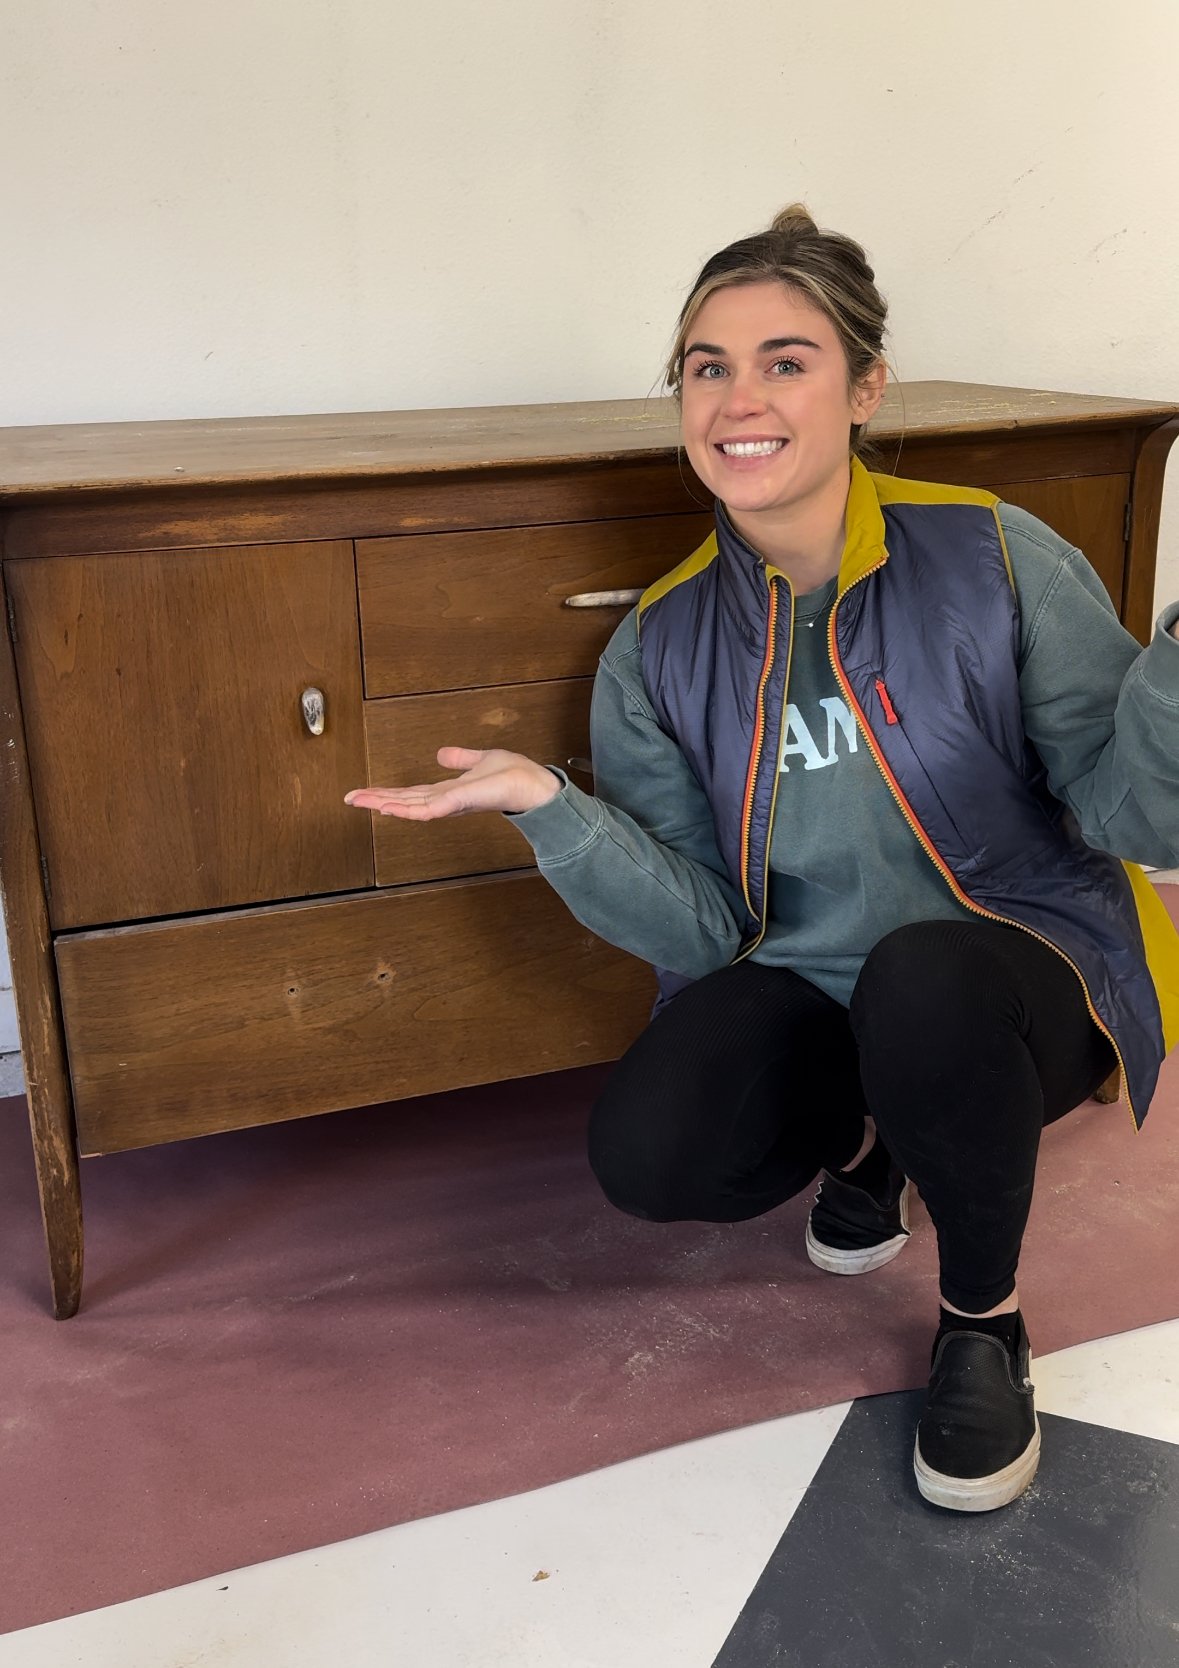
from chaos to chic: the epic transformation of this mid century modern drexel “profile” sideboard!
Today, I'm sharing the nitty-gritty details of how I restored this worn-out Drexel Profile Mid Century Modern Sideboard (my insane Facebook Marketplace Find) into a stunning masterpiece. No frills, just a good ol' DIY journey – let's get started! If you want the full list of supplies used… click here!
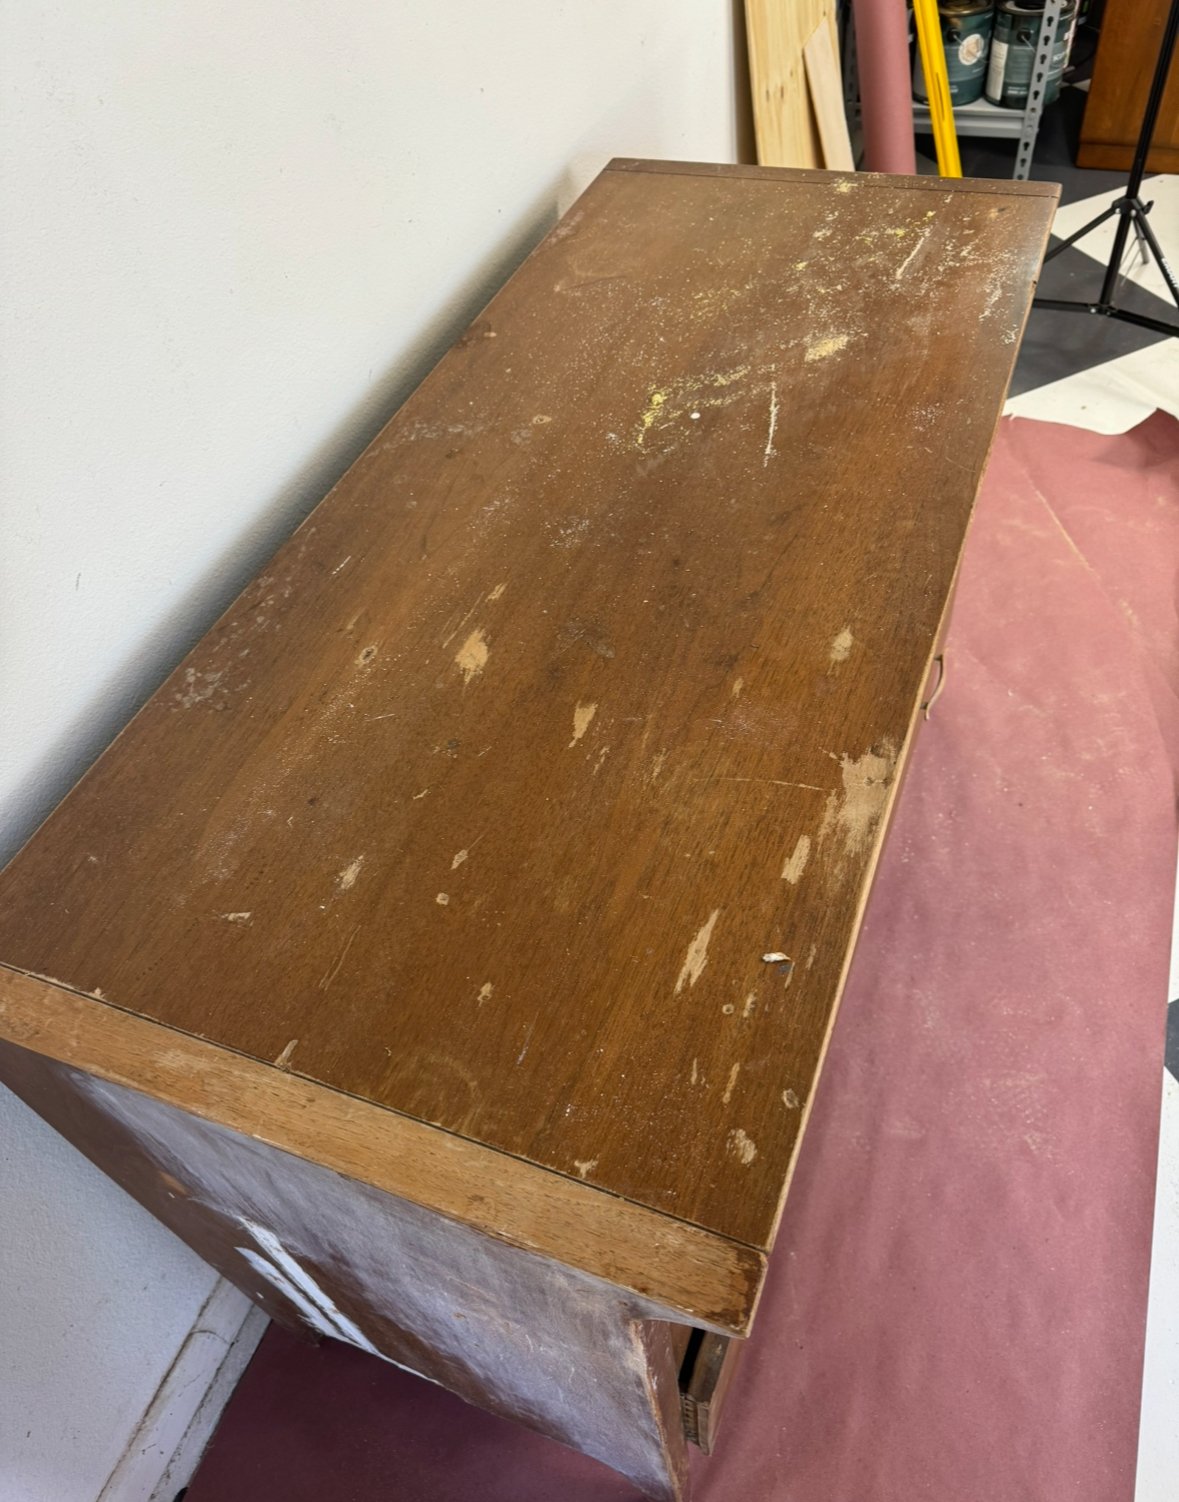
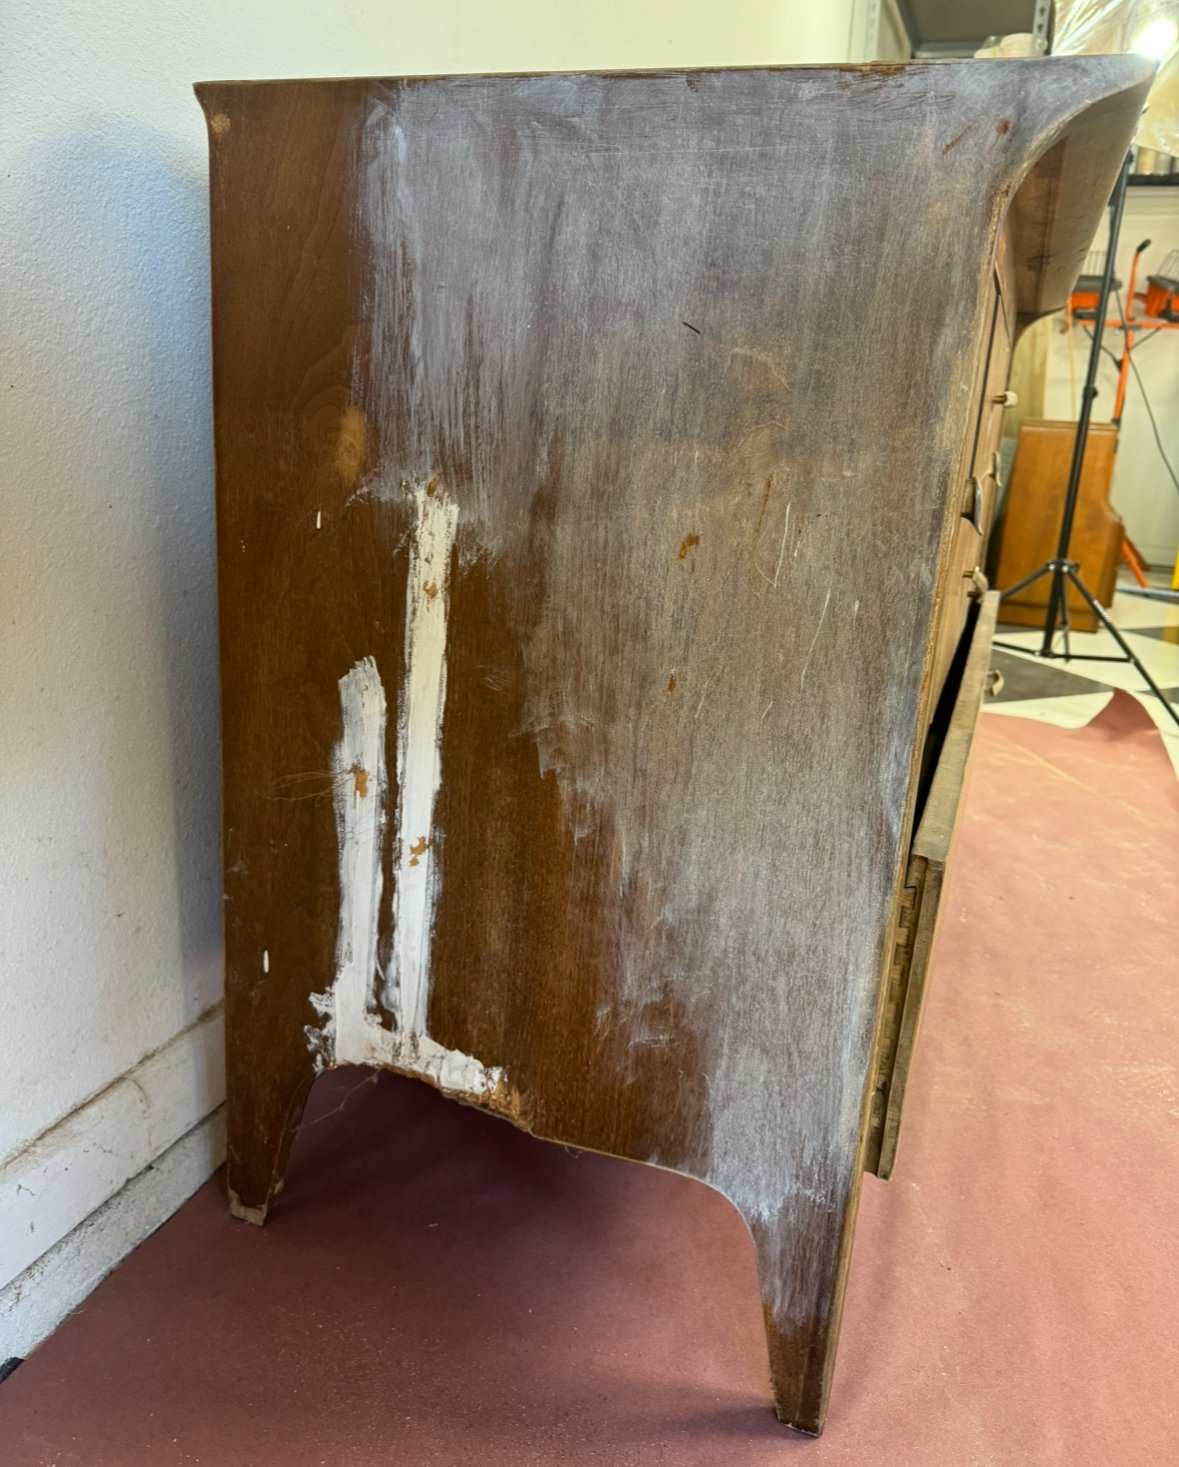
Now this Drexel Profile Credenza/Sideboard was in ROUGH shape. I found it on Facebook marketplace for $50, but it could retail for upwards of $2,000, so I knew I needed to at least attempt a restoration…. what’s the worst that could happen? Haha! There was a massive chunk missing from one side and the top was all scratched up. It almost seemed like it was outside in a shed somewhere used as a workbench… but I saw the potential!

Eco-Friendly Cleanup
I kicked things off with a clean slate using Puracy Natural Surface Cleaner Concentrate. It's eco-friendly, sustainable, and got the job done without any fuss. I clean for a few reasons… 1. because it’s sanitary. And 2. it prevents my sanding pads from gumming up too fast. If they gum up too fast, then that leads to an increase cost of supplies!
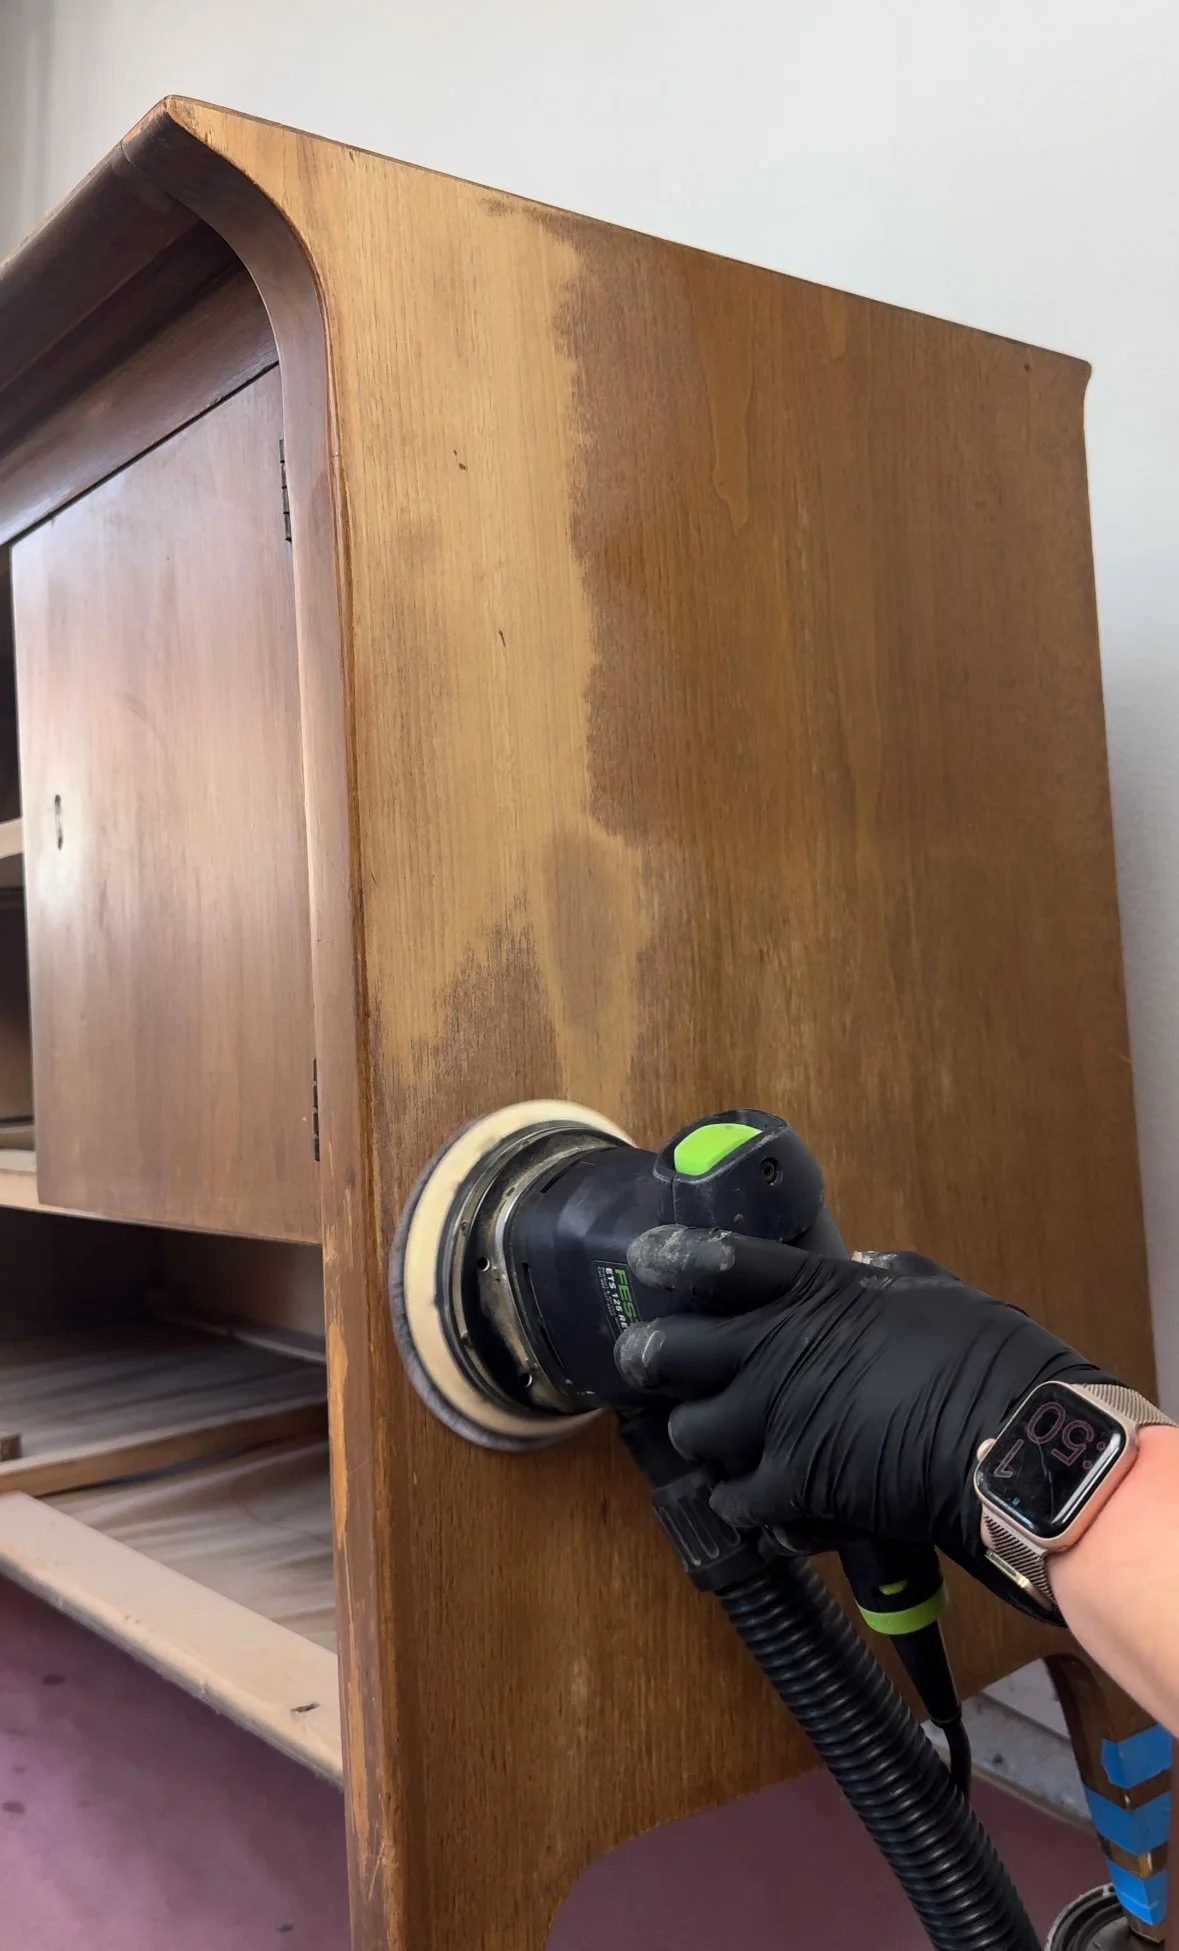
sanding session
Armed with 120 + 180 grit sandpaper, I bid farewell to the old finish using my favorite Festool orbital sander! This sander is MAGIC. Worth every penny. No magic here, just elbow grease and a bit of patience. This was veneer, so I was careful not to apply too much pressure to my sander or use too low of a grit… otherwise I run the risk of burning through the veneer which is NEVER fun and pretty hard to repair.
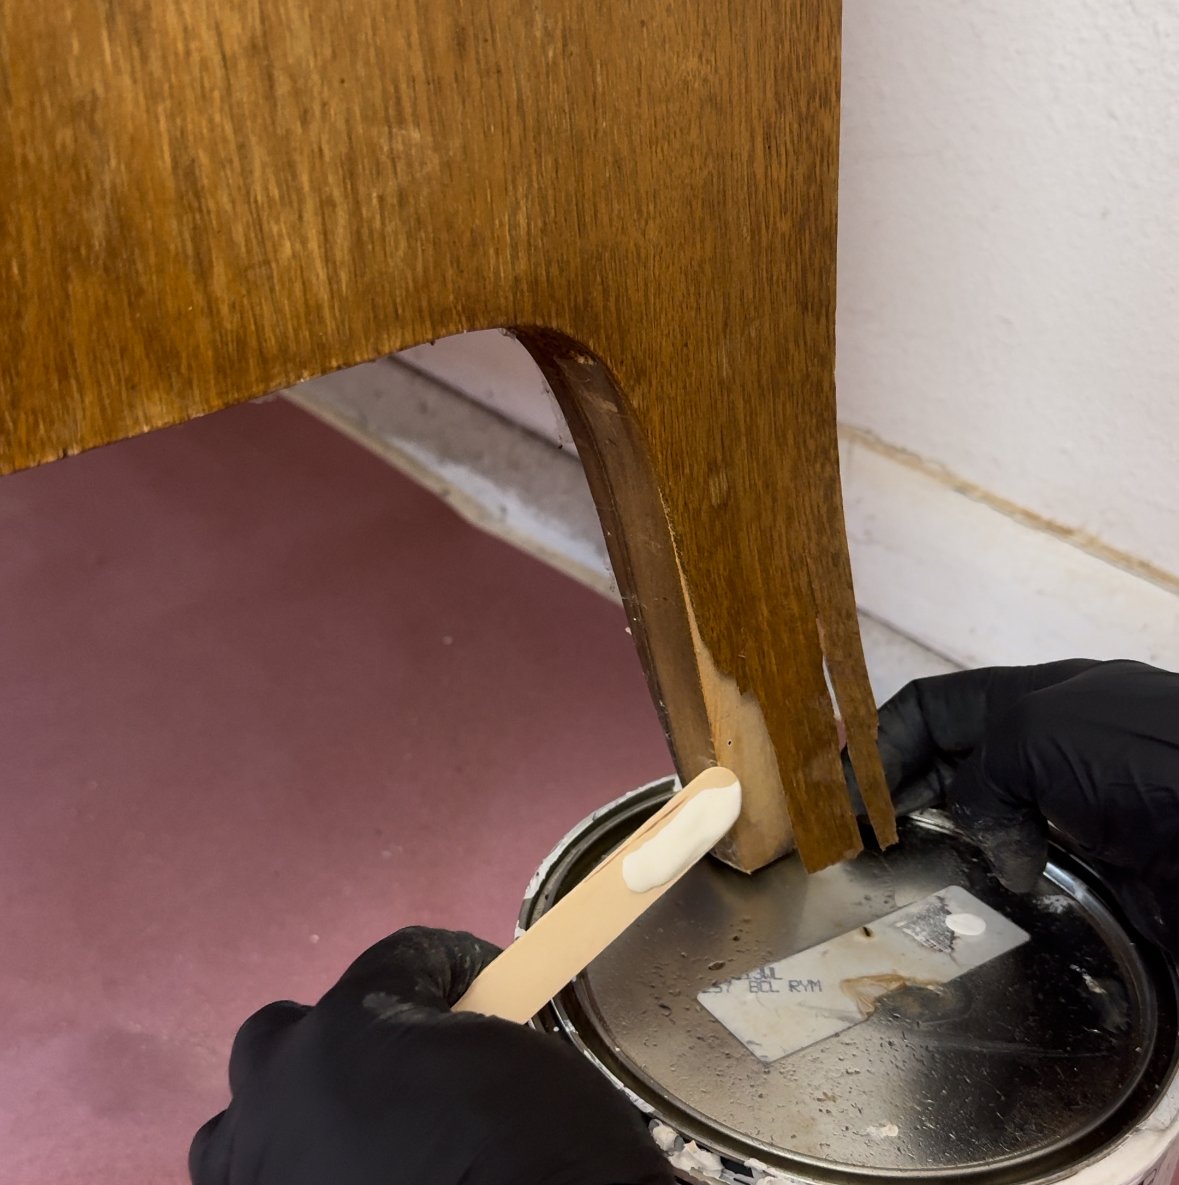
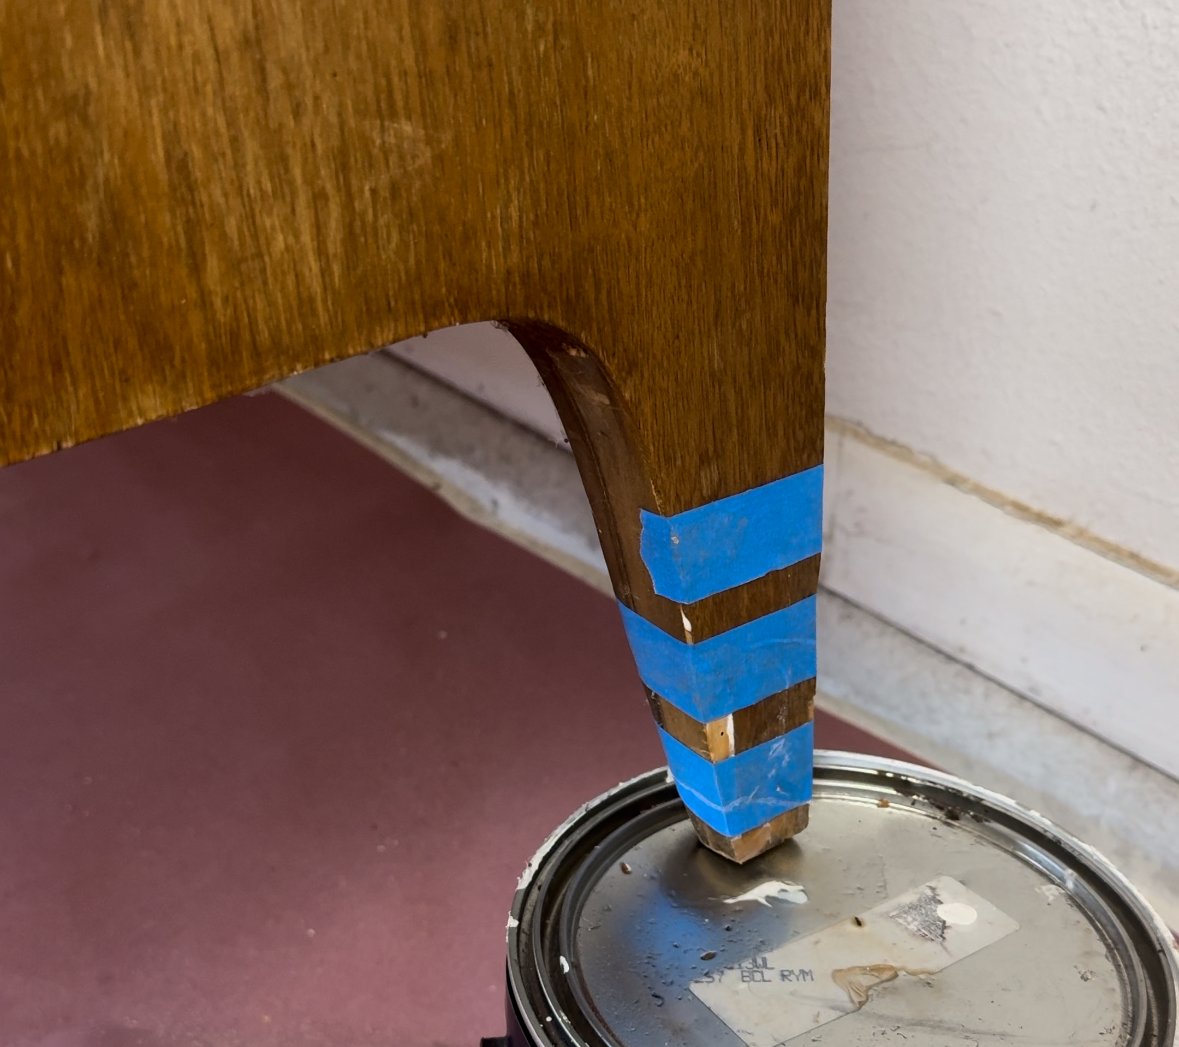
Veneer Rescue Operation
I repaired with floppy veneer on the front leg by placing some wood glue onto a popsicle stick and getting it underneath the veneer. I used painters tape to secure it down. I could’ve also used clamps, but I the veneer is very light so the painters tape pulled tight was just perfect!
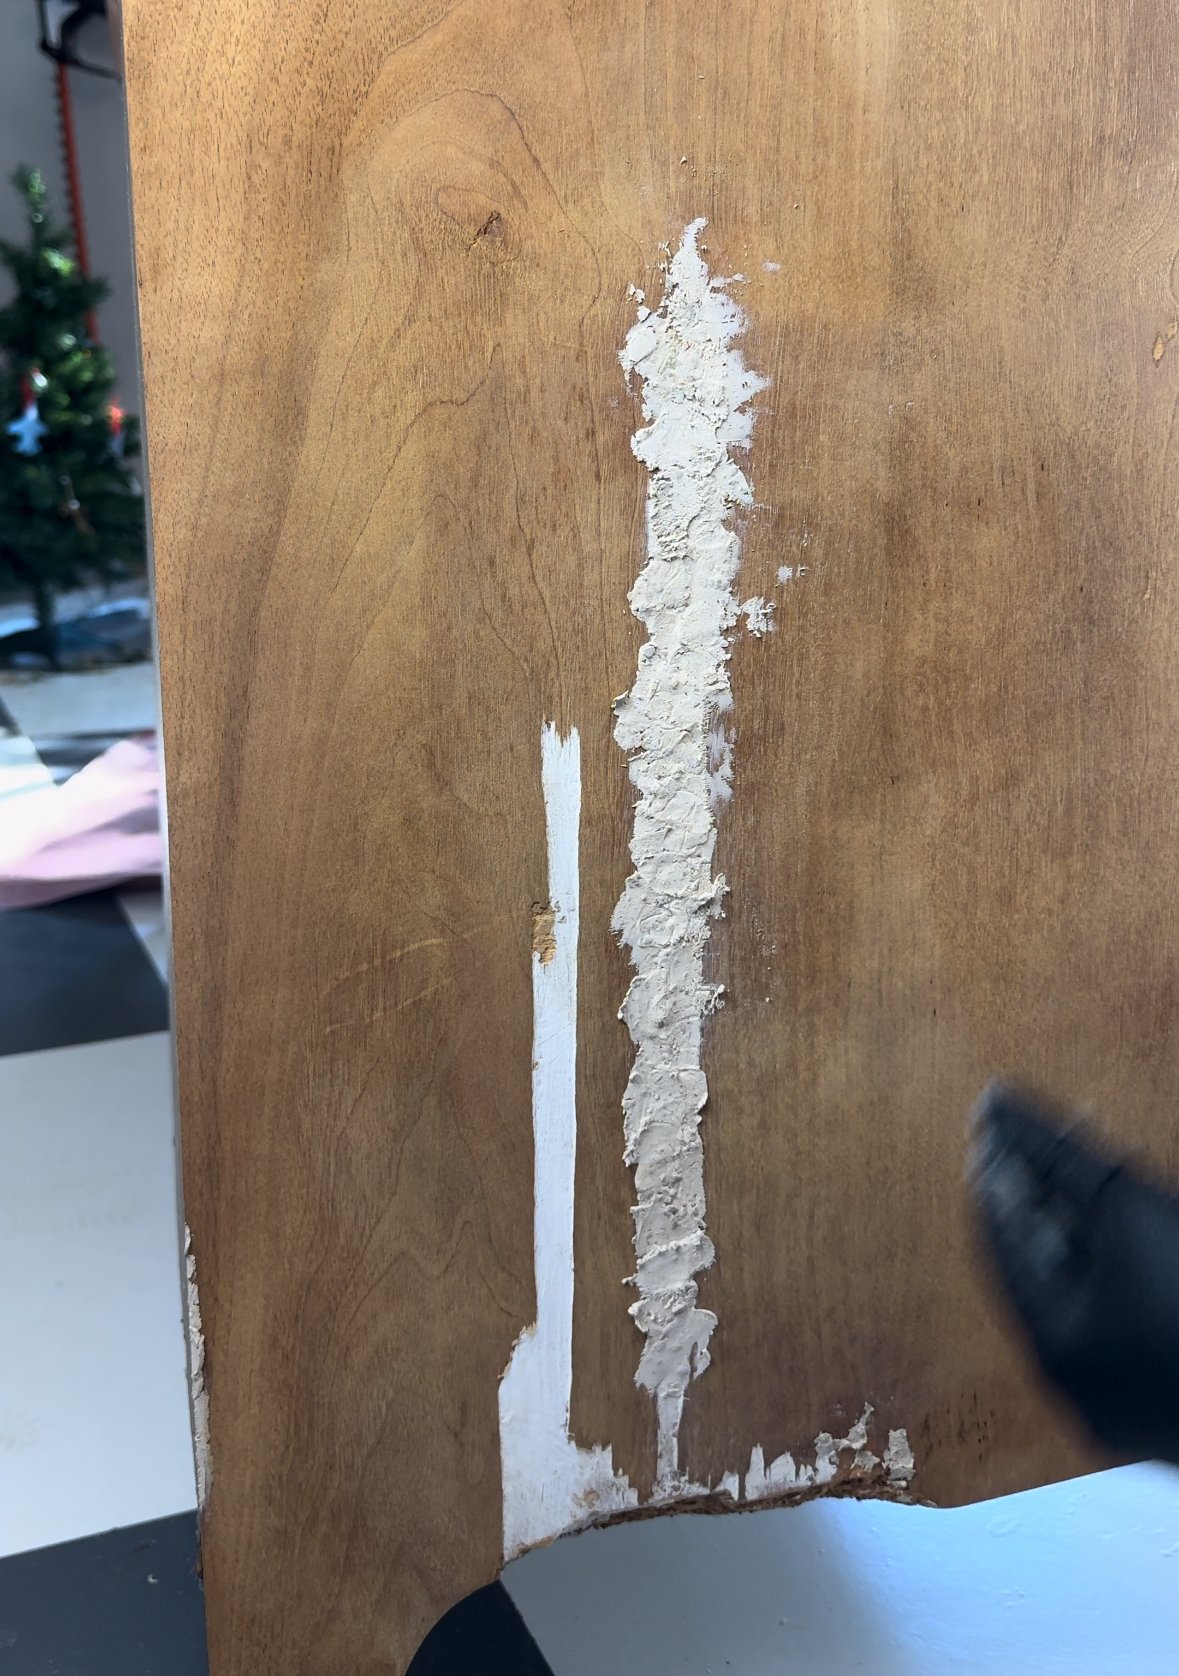
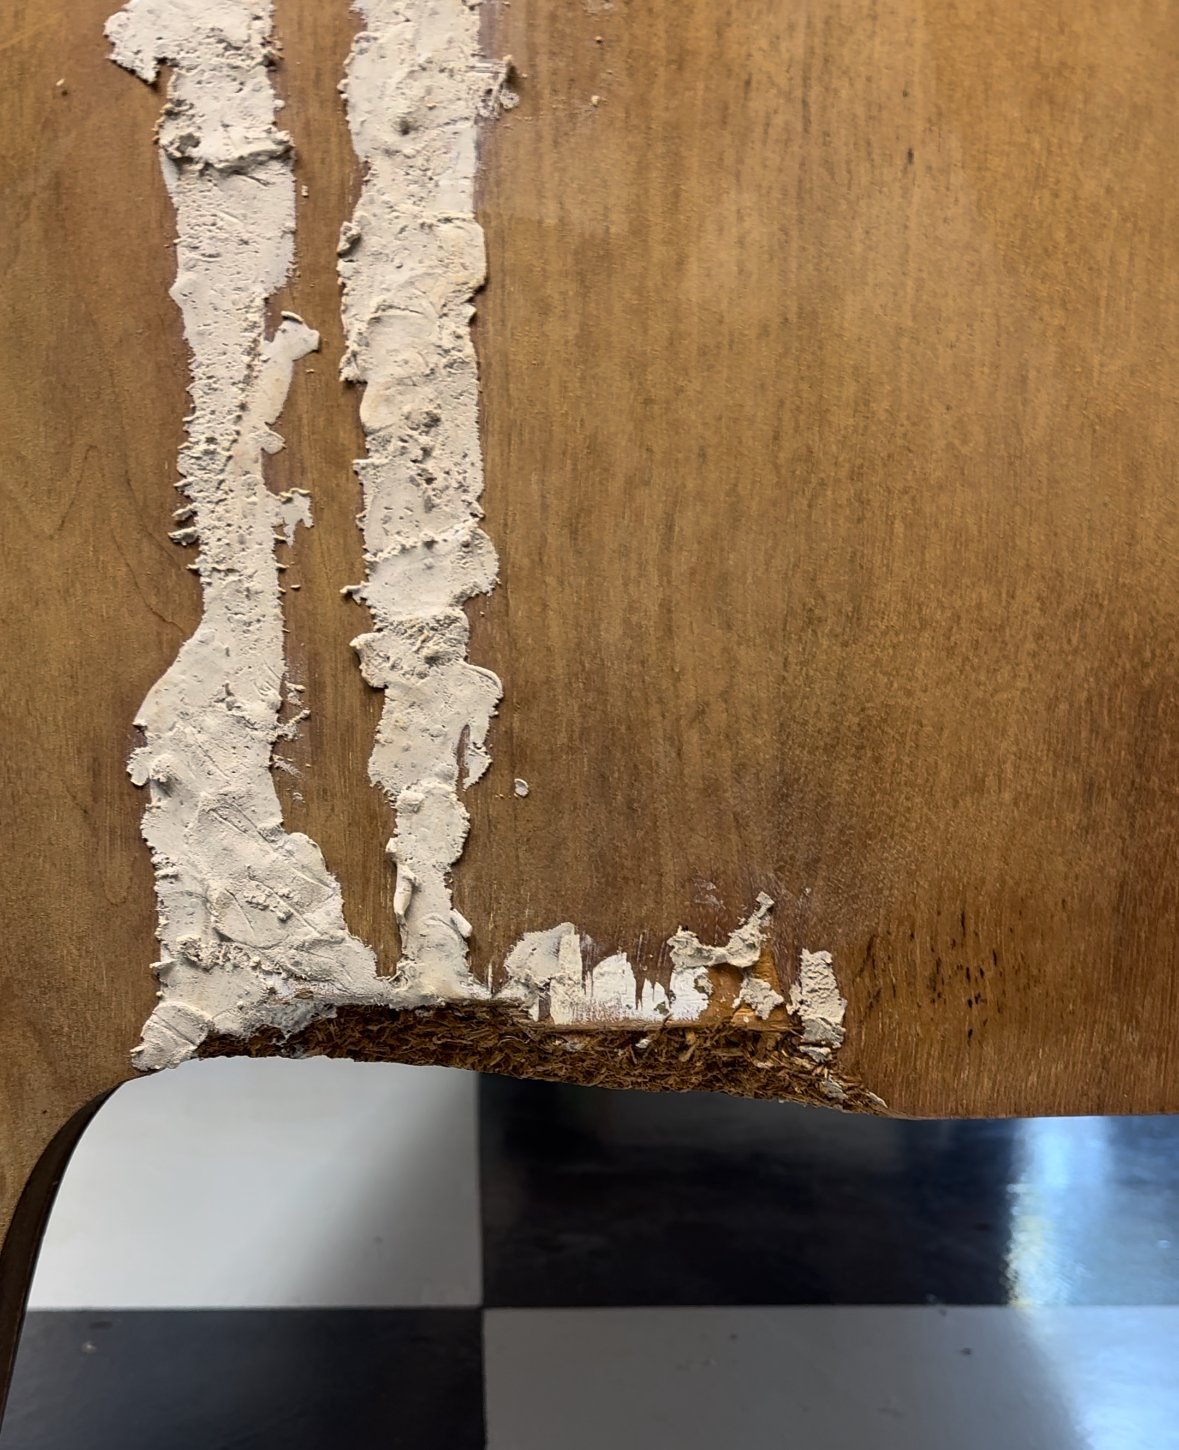
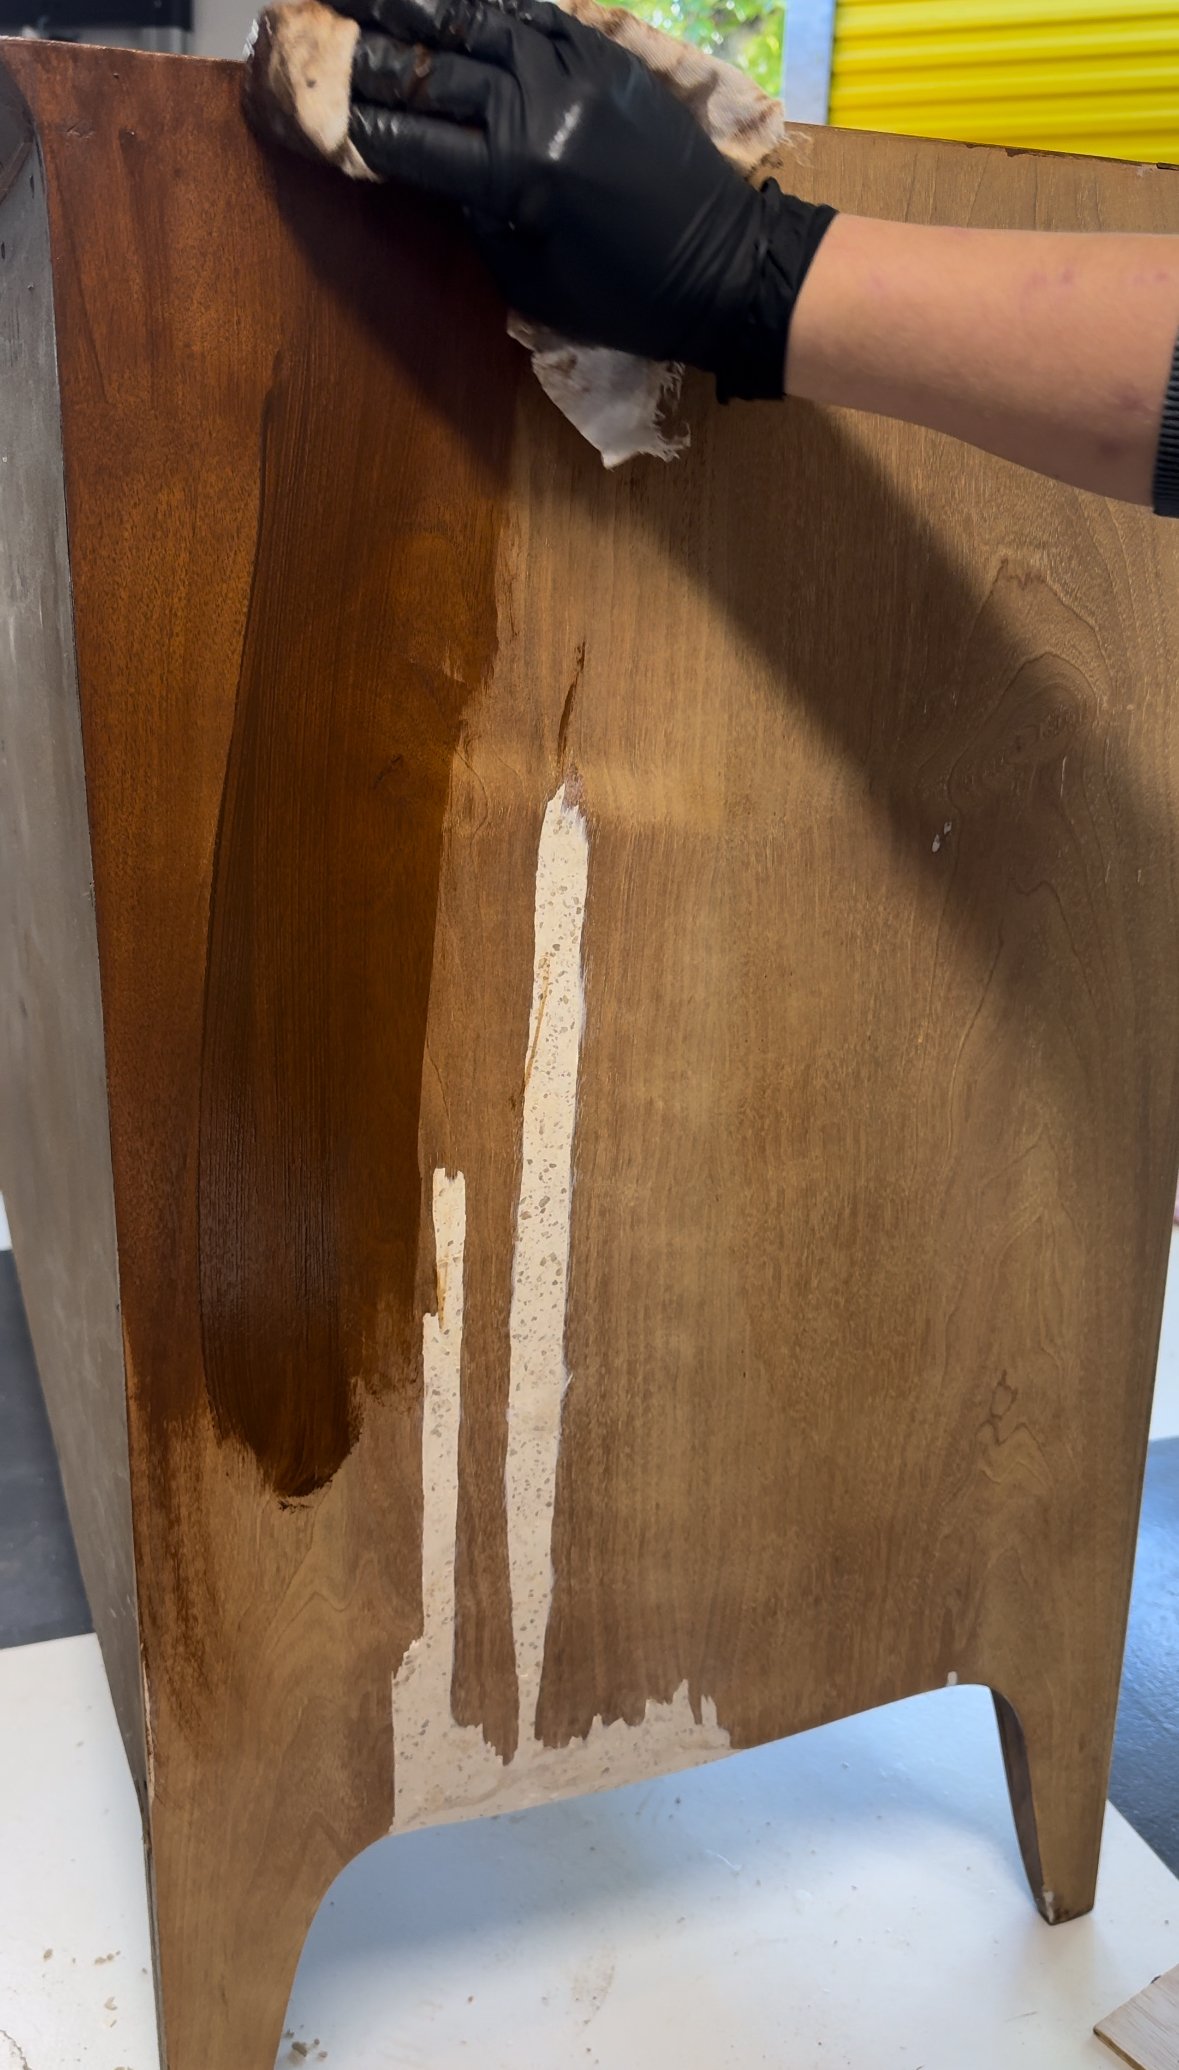
Epoxy Putty Artistry
Time to address the GIANT chunks of veneer & MDF missing from the side of this piece… Enter 2.5 containers of epoxy putty. The mission – rebuild edges and fill in missing veneer. This stuff is amazing. I’m often asked why I use it over Bondo wood filler… well, Kwikwood is WAY less smelly, you can actually mold it and it’s just all around much easier to use. Only downside is it’s a bit more expensive. This did take a bit longer to dry/harden once applied due to the depth of the repair so I let it dry overnight. The next day, I sanded it down smooth with 120 grit so it was flush with the veneer.
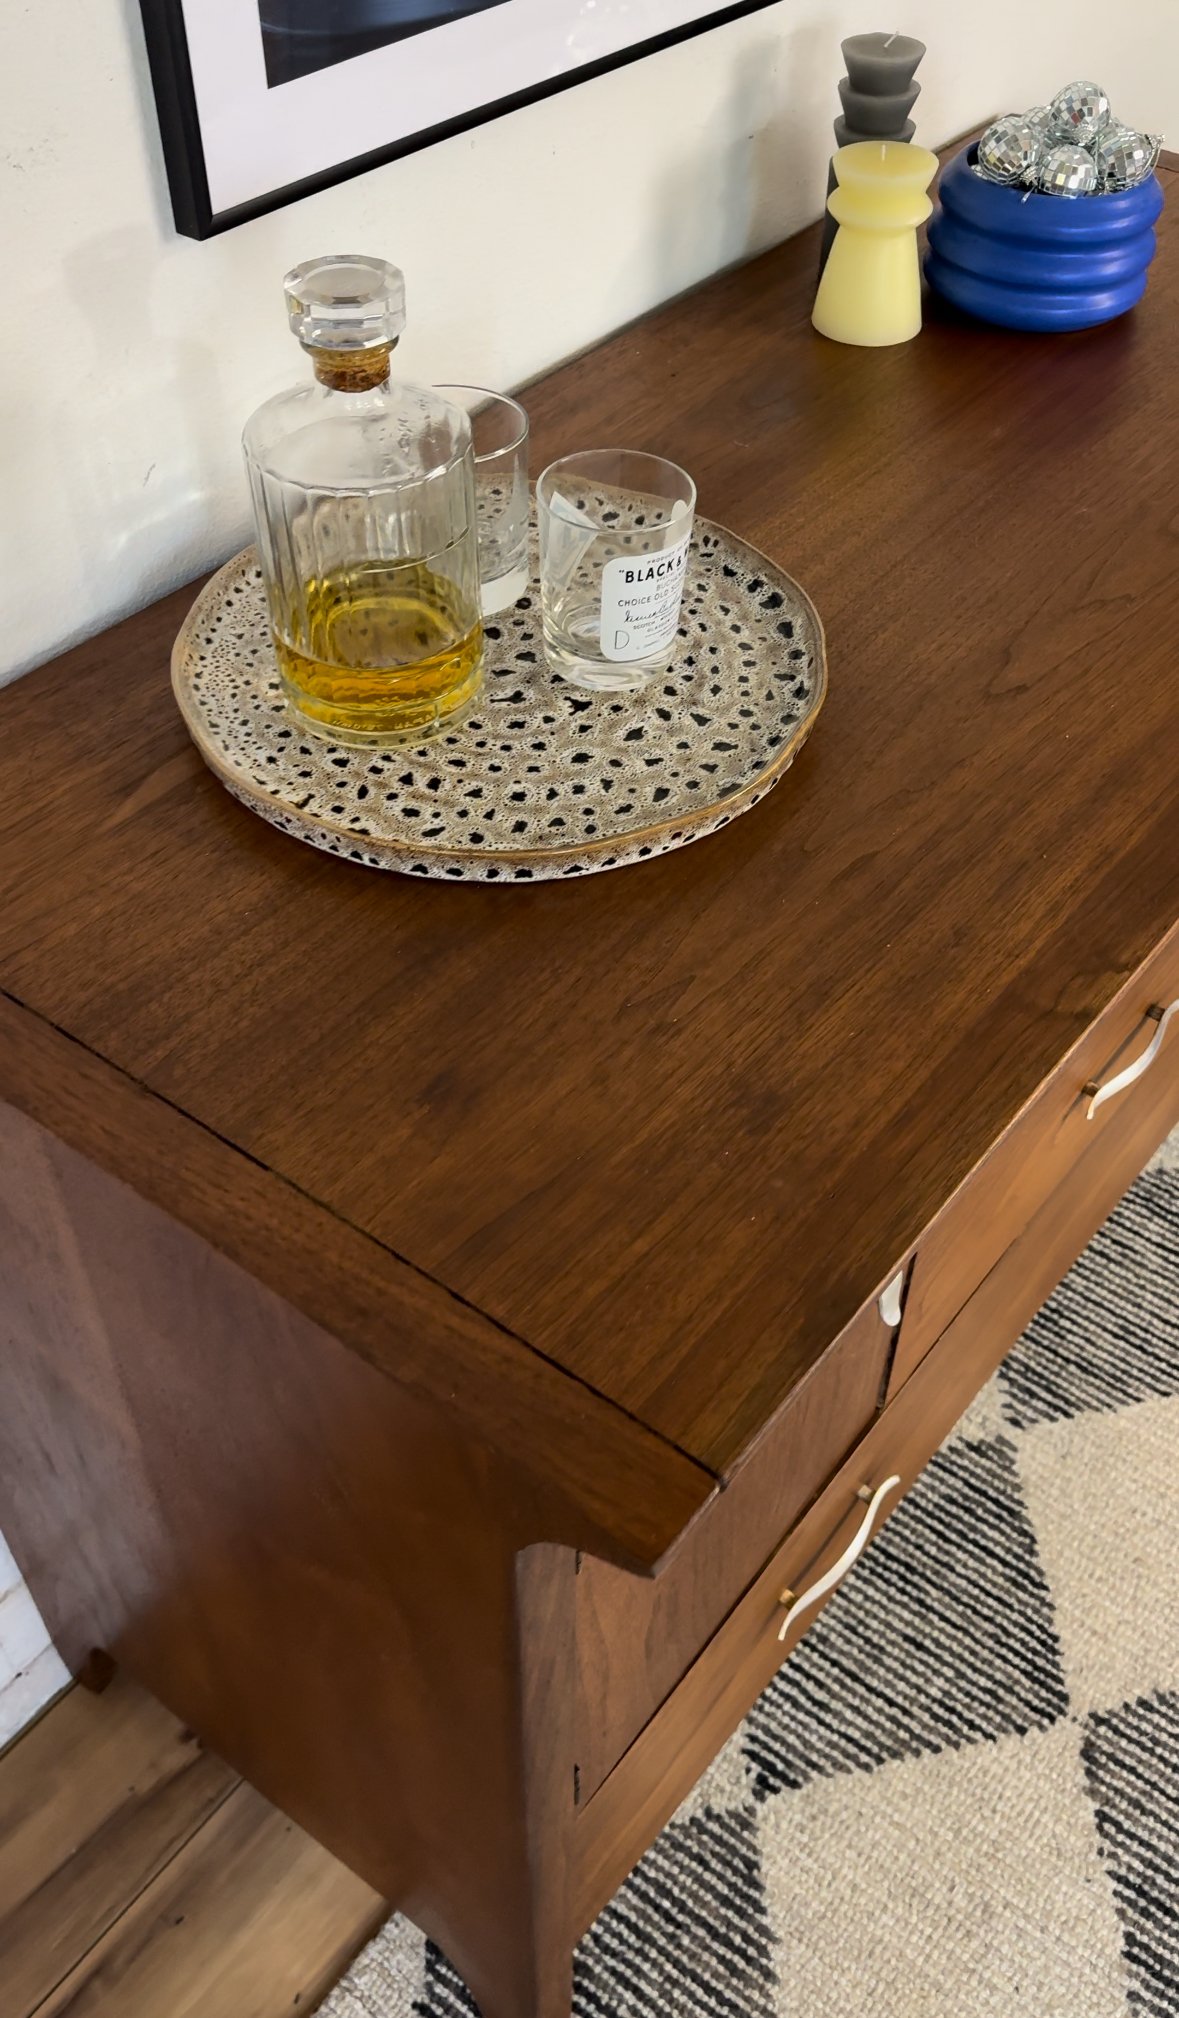
Stain Selection for Timeless Elegance
Once the veneer was prepped, it was time for stain! (side note: I did NOT apply any pre-conditioner since this was walnut veneer and walnut is a hardwood) I applied my favorite stain for mid century pieces… aka Mohawk medium brown walnut wipe-on stain (M545-02056)! Unfortunately, this stain can’t be bought on Amazon, so I have to buy it directly from the supplier. Sometimes you might be able to find it at a local paint store! Be sure to wear a respirator when using this stain as it is professional grade & can cause health problems. Anyways, this stain brought back the timeless touch and totally accentuated the natural elegance of the sideboard… bringing it closer to it’s original beauty! This step required a keen eye for balance and an understanding of the wood's character.
Blending Repairs for Seamless Integration
To blend the massive repair I made with the epoxy putty, I used my Mohawk Blendal sticks. I swear by these things. They’re basically wax crayons that can be easily blended by hand. Each stroke aimed to seamlessly integrate repairs, ensuring that the scars of the restoration process harmonized with the overall aesthetics of the piece. The key is to not apply to much pressure with the crayon, the lighter the layers the better. Be sure to seal the repairs with a Vinyl Sealer so they don’t budge. In terms of makeup, think of it like a permanent setting spray, haha! Now, there were a few other things I could’ve done instead of using putty for the repair. I could’ve bought some walnut veneer and cut out a piece to match the grain & install it where the damage was. I didn’t do this because I didn’t have the supplies or time to wait for the supplies to come in. Also, I would’ve still had to use epoxy putty to repair the missing edge of this piece. The other thing I could’ve done is used a pigment to mix it into the Kwikwood epoxy putty to color it prior to application, but I didn’t have that on hand. I could’ve also used pre-colored epoxy putty, but I didn’t have that on hand either and it’s extra expensive.
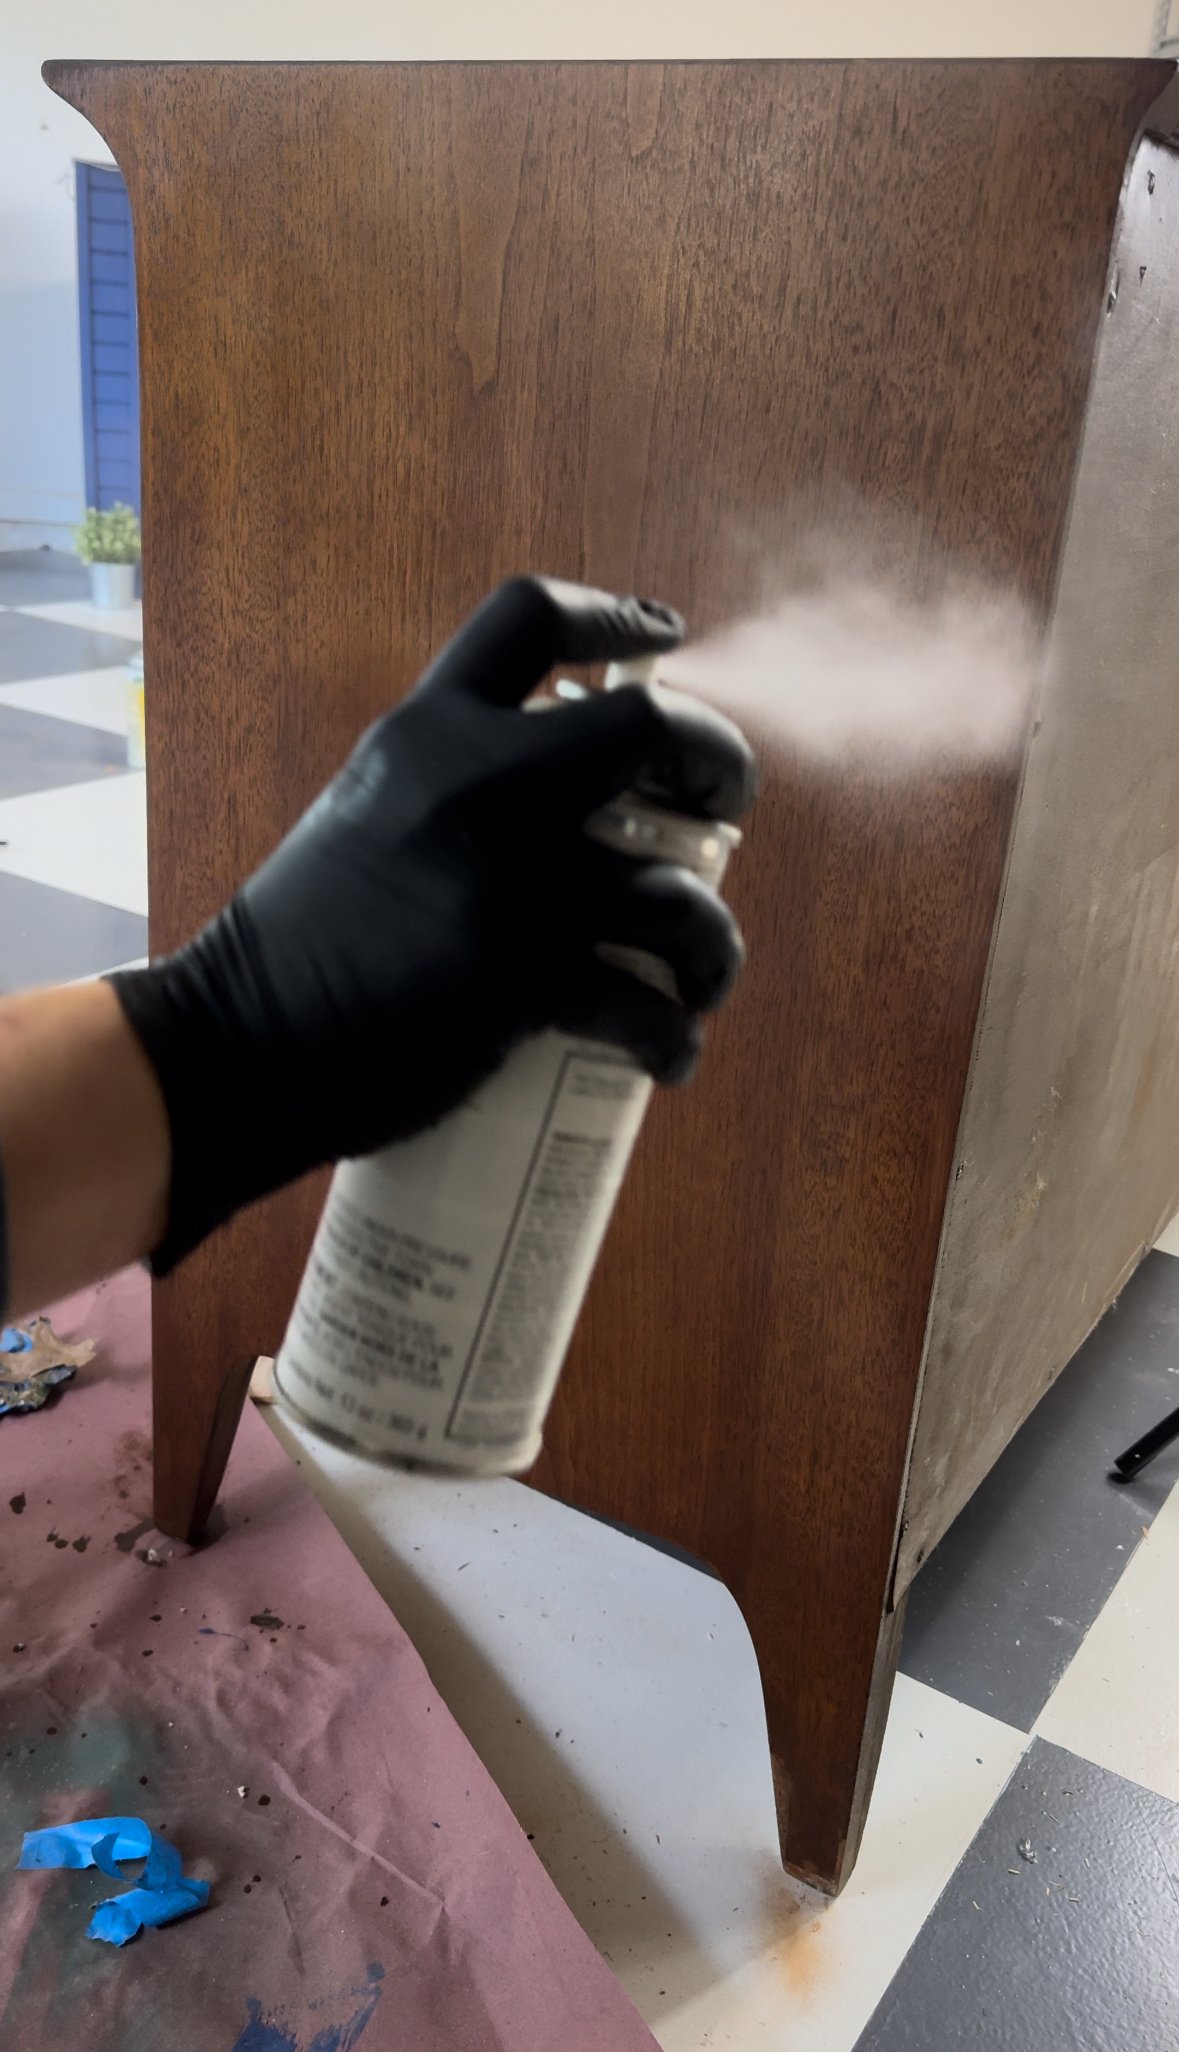
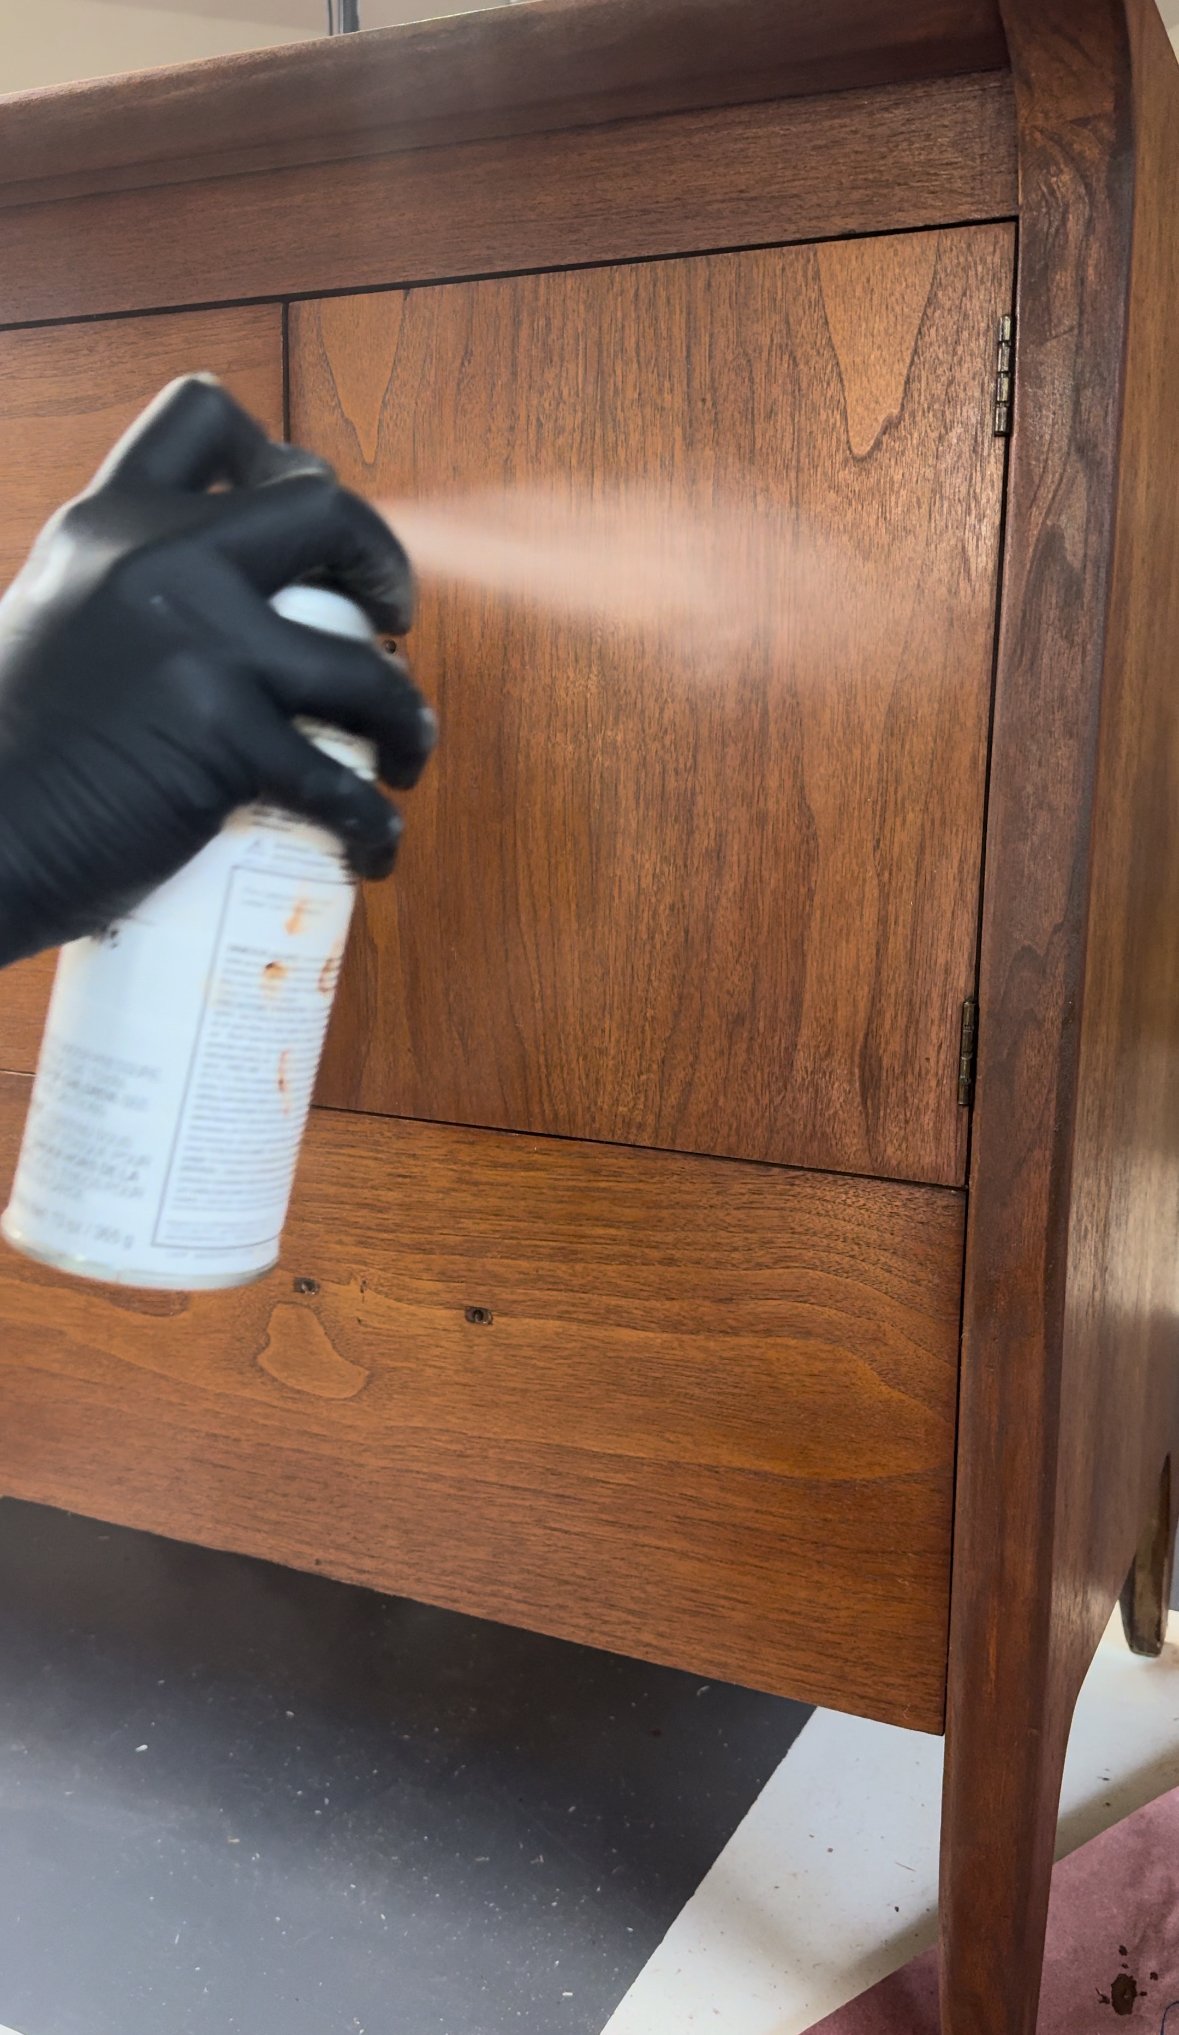
Sealing the Revival
To ensure the longevity of the restoration, I used several coats of Mohawk semi-gloss lacquer. I’m talking like 6-7 coats, haha! This protective layer not only added a subtle sheen but also safeguarded the sideboard against future wear. Again, you MUST wear a respirator when using these products, they can really mess you up! And be sure to use in a ventilated area. Note: since I used the wax crayons for the repair, I could NOT use a water based polyurethane because it wouldn’t have adhered to the repairs. I also couldn’t use a wipe-on oil based polyurethane because it would’ve just wiped off the repairs.
In Conclusion…
Now, the pivotal question arises – how should I price this restored mid century modern vintage gem? Your insights are welcomed in the comments below. For those interested in a detailed list of the supplies used in this Drexel Mid Century Modern Sideboard restoration, click here or see below for the itemized list! This journey wasn't just about fixing a piece of furniture; it was a celebration of craftsmanship, patience, and the art of breathing new life into vintage charm. Stay tuned for more restoration tales and the timeless allure of DIY craftsmanship. 🛠️✨